

So you signed up for a hosting service and installed WordPress. You’ve already come so far!

What is WordPress?
WordPress is an open-source (AKA free) content management system (CMS). If your website were a house, WordPress would be the foundation. WordPress themes are the framework through which you build your website, much like the structure of a house that you would build on top of the house’s foundation. The theme would also include paint and flooring (fonts and colors). And plugins are all the things you put inside the house that make it more functional, such as a dishwasher, air conditioning, and a laundry machine.
The remarkable thing about themes and plugins is that they make it so you don’t need to know how to write code to create a website anymore.
Four Steps to Grasp the WordPress Fundamentals
Now that you have the basic understanding of how WordPress works, let’s take a look at the WordPress dashboard.
At first glance, the WordPress dashboard can feel daunting. Yes, there are one million things you can do here. But practice putting your blinders on and only pay attention to these four things:
- How to Log In
- How to Reset Your Password
- Where to Find Your Plugins (and what to do with them for now)
- Where to Find Your Themes (and what to do with them for now)
Trust me, this will make your life a lot easier! In this post, I will teach you the WordPress fundamentals and how to navigate this powerful (and free!) tool.
If you don’t have a hosting service yet, check out my post to help you choose the right DreamHost plan.
1. Log In to Your WordPress Dashboard
First, Access Your Website through DreamHost
The most fundamental of WordPress Fundamentals is accessing your WordPress dashboard. If you installed WordPress through DreamHost, navigate back to your “Manage Websites” page (click “Websites” on the left navigation to initiate the dropdown menu, then click “Manage Websites”) and click the “Manage” button to the right of your domain.
Right there on the DreamHost dashboard for your domain, you’ll see a link to the right that says, “Log in to WordPress.” Click that!
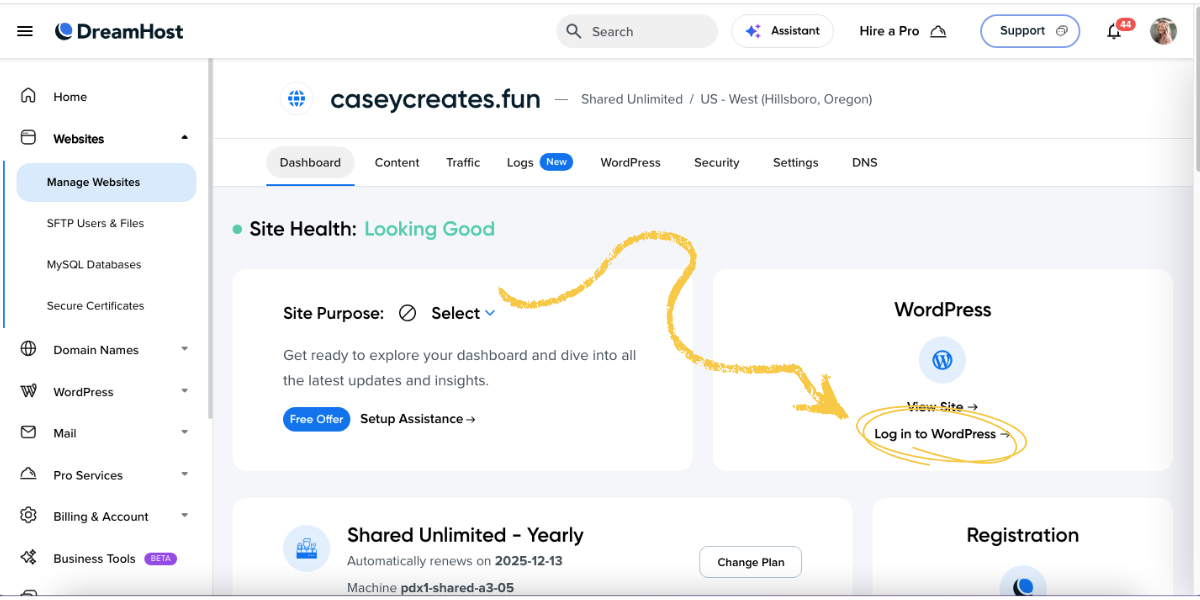
This will open your WordPress dashboard in a new browser tab. And you’re in!
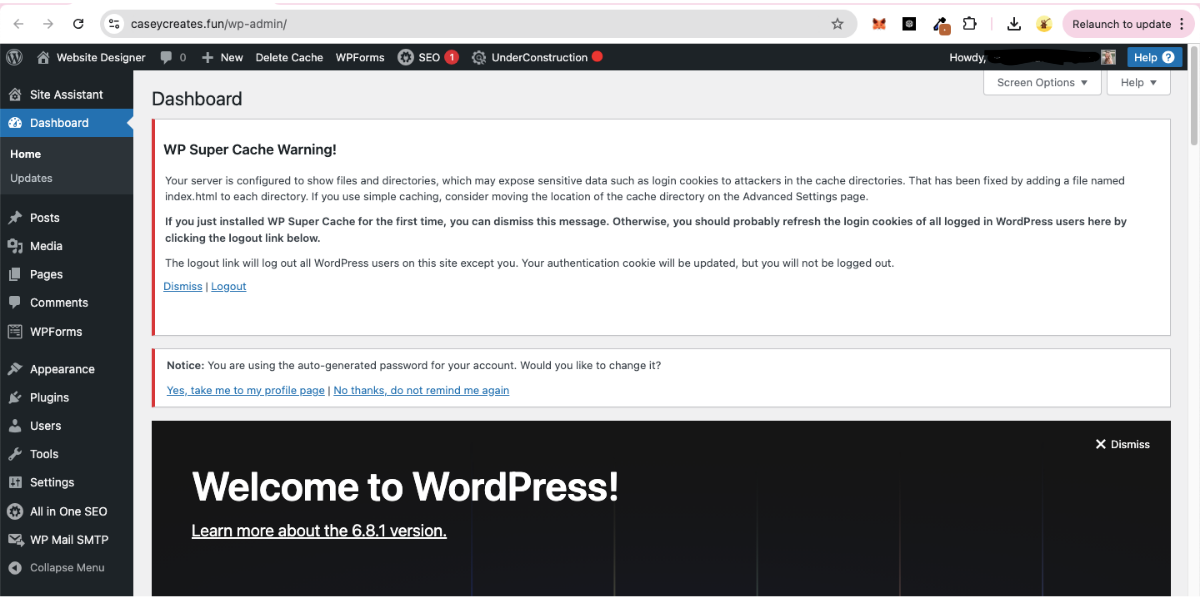
2. Reset your WordPress Password
By default, DreamHost created a username and password for you. From the left side menu in your WordPress dashboard, click “Users.” This will direct you to a page that displays all users on your site. There should only be one user – you.
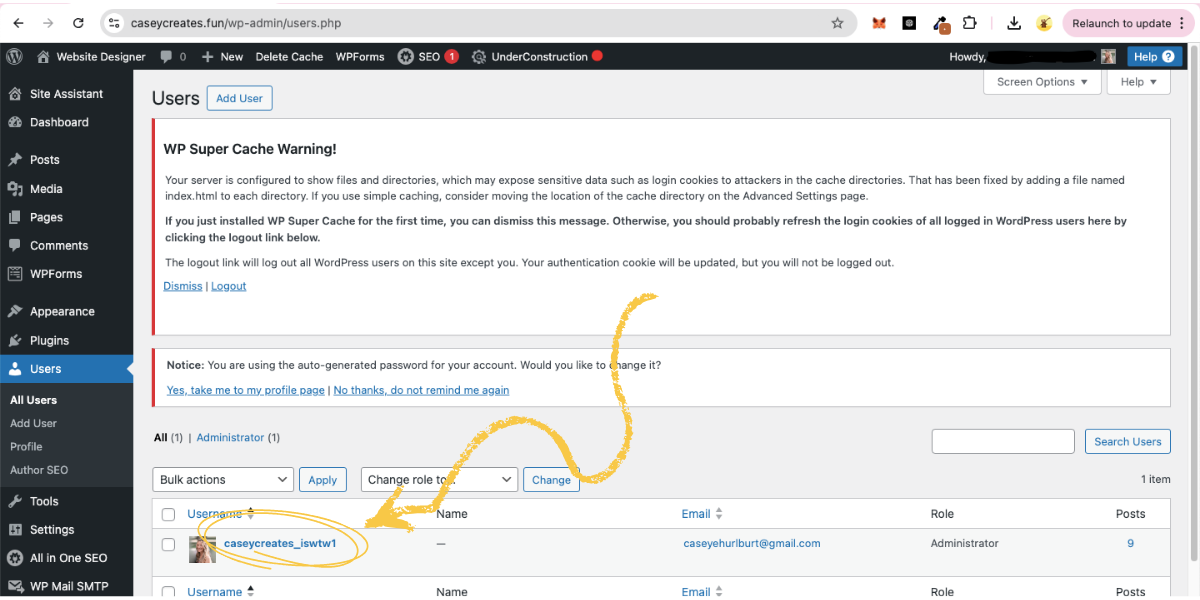
Click your username. This will direct you to your WordPress profile. You’ll see you can change the color scheme if you like (this is only the color scheme for the backend of your WordPress site; your users won’t be able to see this change), as well as change your password and bio. However, you won’t be able to change your username.
Change your nickname to your name, and change your name displayed publicly from the dropdown to your name as well. You’ll notice that in the upper-right-hand corner of the WordPress dashboard, it’ll say, “Howdy, [your name]” now, rather than your username.
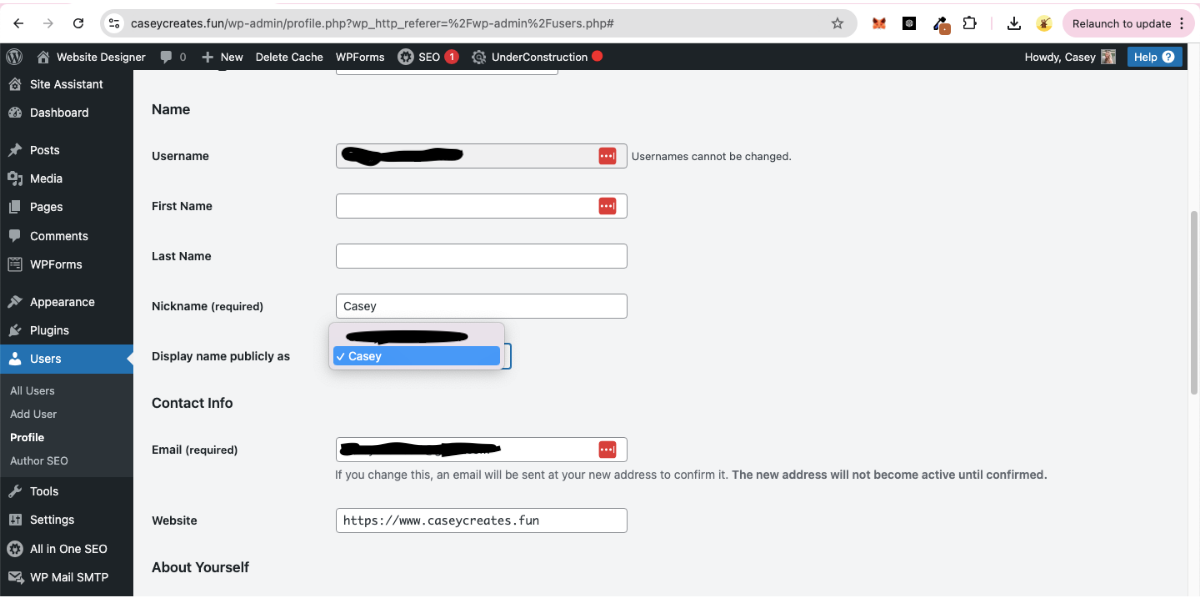
Then, scroll down and find the button labeled “Set New Password.”
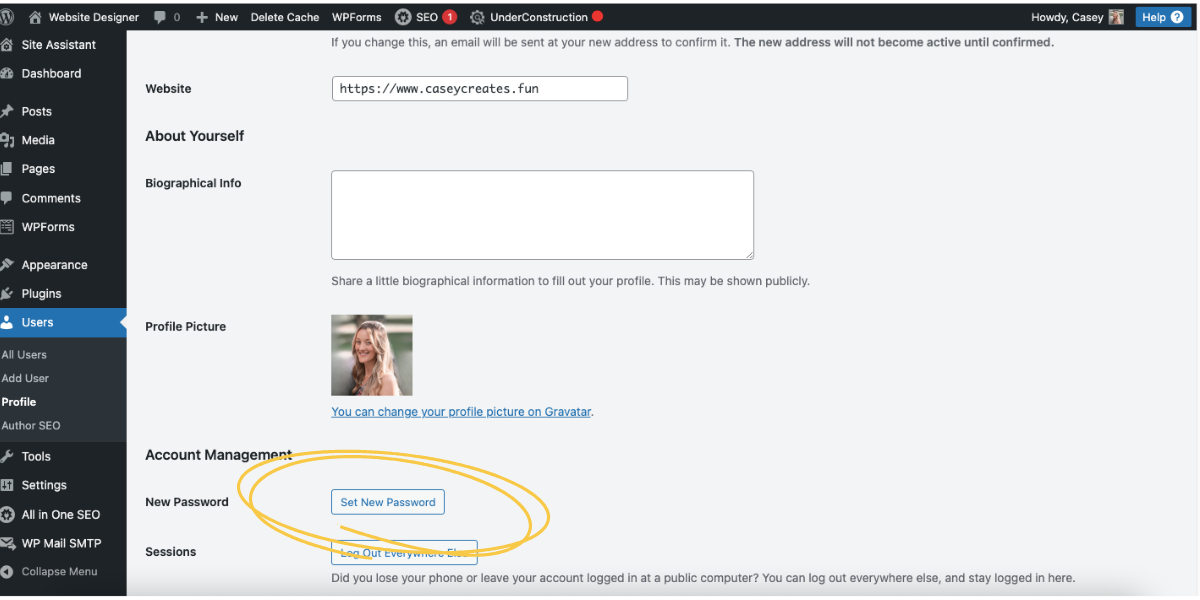
Save your username and password in a password manager or store them in a secure location where you can access them.
Logging in Via WordPress
Now that you have set a password, you will be able to access your WordPress dashboard directly from the WordPress admin in the future.
To log into your account, go to yourdomain.com/wp-admin/. That will take you to the WordPress login page.

Then insert your username and password to log in.
3. Get to Know WordPress Themes
What is a WordPress Theme?
Your next task in conquering WordPress Fundamentals is the concept of WordPress Themes. A WordPress Theme provides the visual and structural framework for your website. It dictates the fonts, colors, and layout of your site.
Where Can I Find My WordPress Themes?
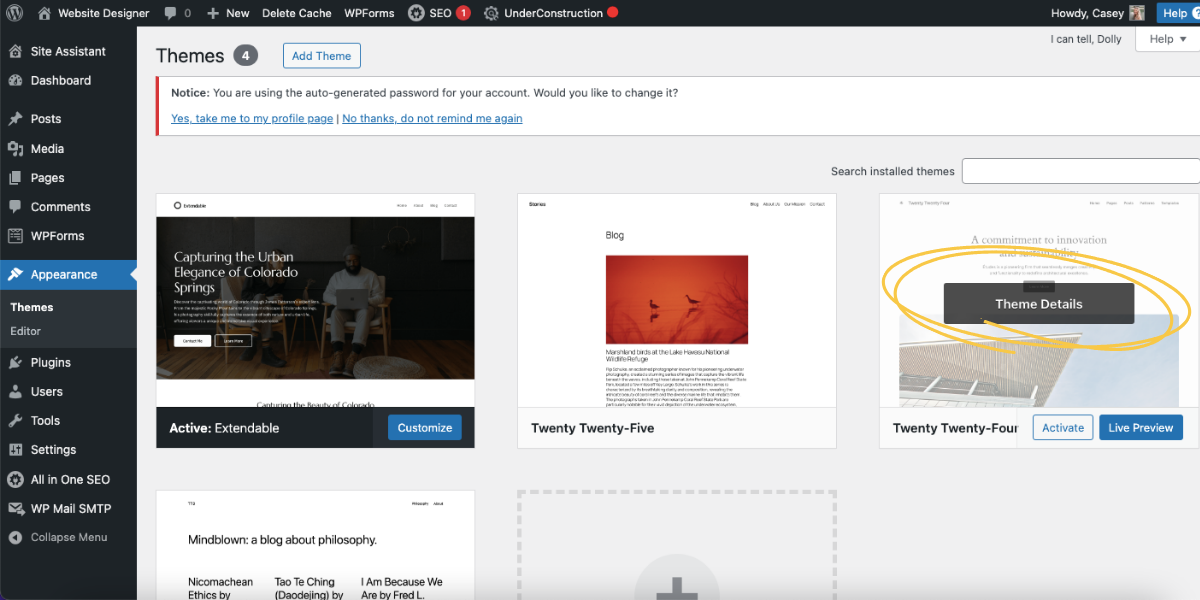
From your left-side navigation menu on your WordPress dashboard, click “Appearance” then “Themes” from the dropdown that appears. You’ll see several themes sitting on your site. Only one will be activated, the furthest one to the left. That theme is the one DreamHost set up for you during the WordPress installation process.
Setting Up the Theme Page
Leave your activated theme alone, and leave the next theme to the right of your activated theme alone also. That theme is probably called “Twenty Twenty-Five.” “Twenty Twenty-Five” will act as your backup theme.
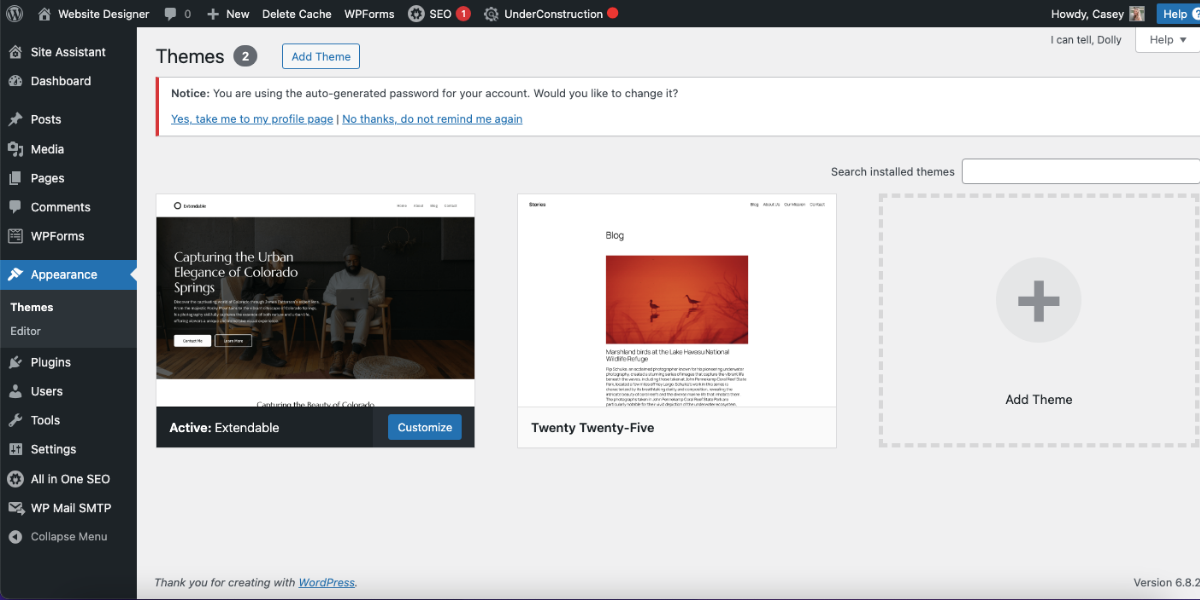
After you complete the following steps, you will have two themes on your “Theme” page: the first one, which was already activated, and “Twenty Twenty-Five” (which will remain unactivated).
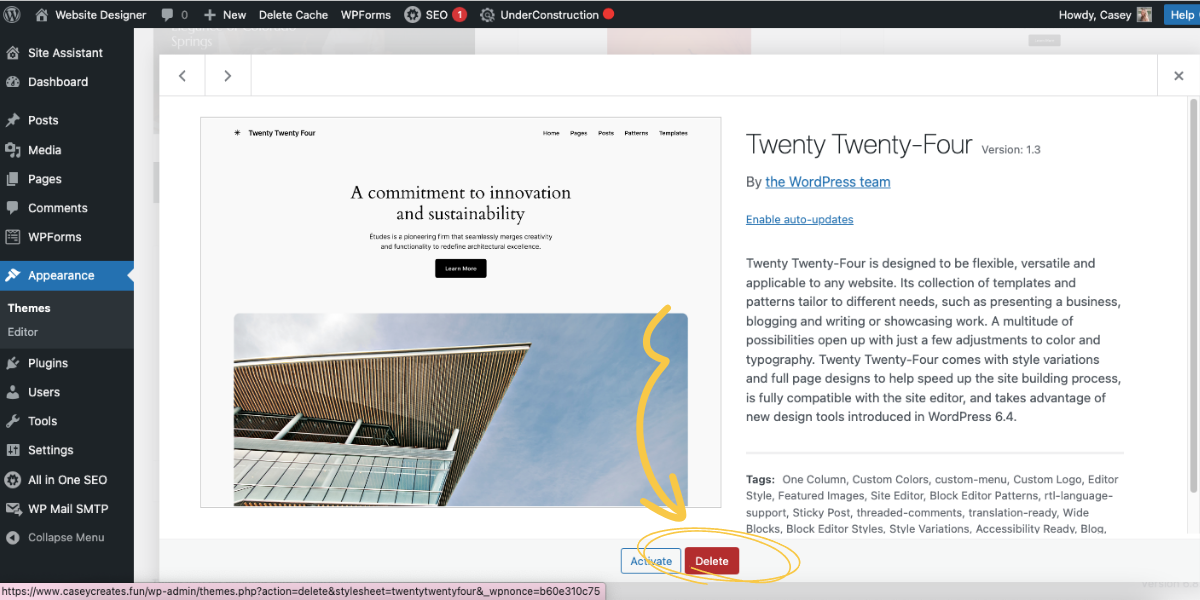
Hover over the next theme, which is probably called “Twenty Twenty-Four,” and click the “Theme Details” button that appears.
Then, click the red “Delete” link. Repeat this step for all themes except the first two.
Once you’re done deleting the extra themes, your “Theme” page should resemble the image below. Please note that your first activated theme may differ from mine.
4. Understand WordPress Plugins
What are Plugins?
Lastly, you should have an understanding of plugins. You can think of plugins like apps for your website. They help solve problems and allow you to customize your site without needing to use code.
Do you need to optimize your images to improve your site’s loading speed? What about a contact form so your audience can reach you? Yes, there’s an app a plugin for that!
Where to Find My Plugins
If you installed WordPress using the DreamHost installation guide, as I recommended, you already have some plugins on your site.
From your left-side menu, click “Plugins.” This will direct you to the page where you can view all your plugins. After downloading a plugin, you must activate it to use it. As a rule, you should delete inactive plugins. Don’t have a bunch of plugins downloaded that are just sitting on your site, unused.
Setting Up the Plugins Page
Check and see if any of your plugins need to be updated. If so, update them by clicking the link that says, “update now.” Once you have updated all of your plugins, click “enable auto updates” for all of your plugins.
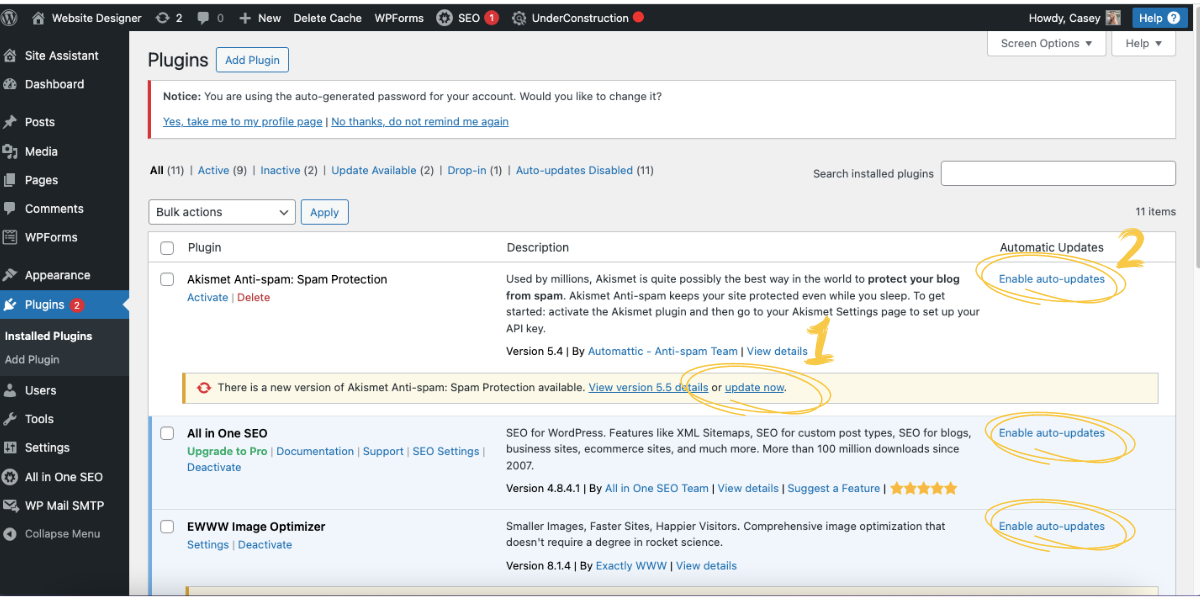
It’s a good idea for security to keep everything up to date on your WordPress website.
To learn more about plugins and which ones you need for your client-based practice, check out my post devoted exclusively to WordPress plugins, coming soon!
Now, the backend of your WordPress site is well-organized and set up for success. Please comment below with any questions or comments! I’d love to hear about your tech journey.


0 Comments