

Before you learn how to make your WordPress website live, you’ll need to sign up for a hosting account. And it’s more fun and user-friendly now than ever to create your own site. No coding necessary!
This post explains how to install your WordPress website with the DreamHost hosting service. That is the one I use for all my sites and the one I recommend because it is both affordable and user-friendly. They also offer free help with set-up on occasion. Check out my post about how to set up your account with DreamHost if you still need hosting!
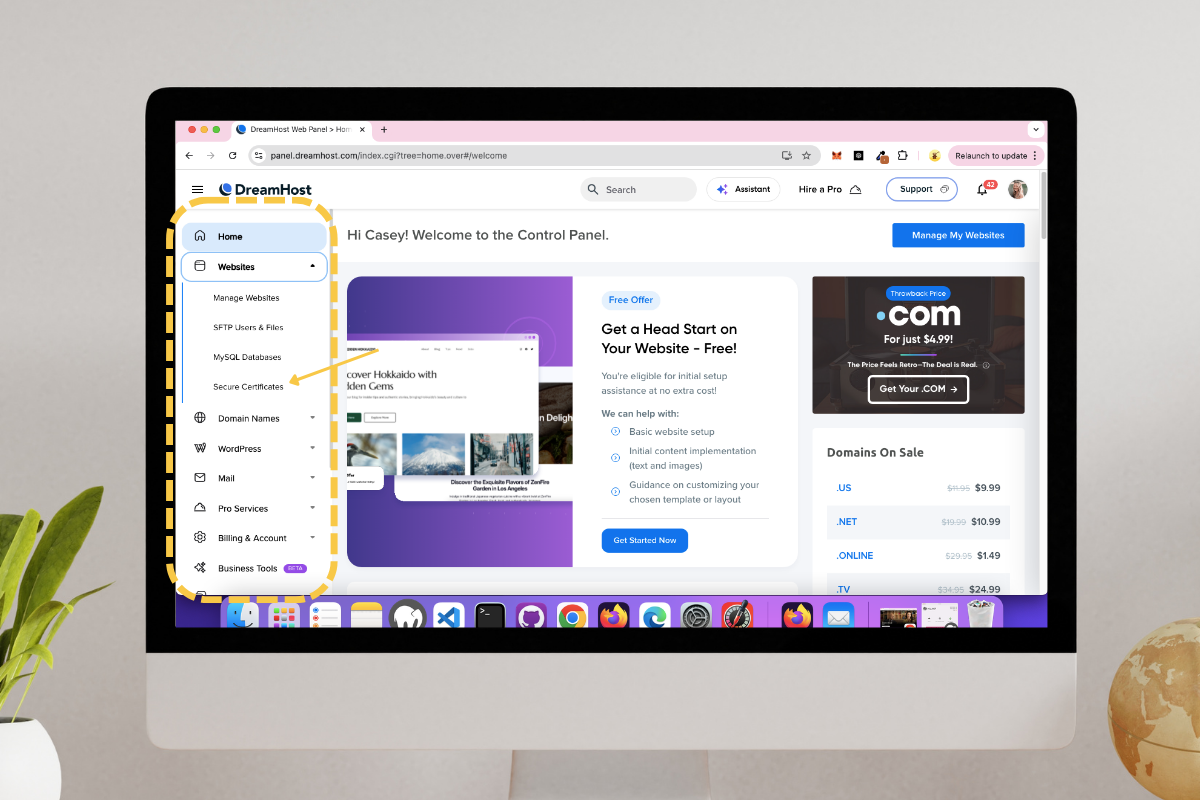
Step 1: Set up Security for your new WordPress site
Once you have set up your hosting account, you’ll want to ensure your site is secure. Log in to DreamHost. From the homepage, you’ll see a navigation bar on the left side of your screen (see below). Click “Websites” then “Secure Certificates” from the dropdown that appears.
Next to your domain, in the right-hand column, click the blue button that says, “Add.”
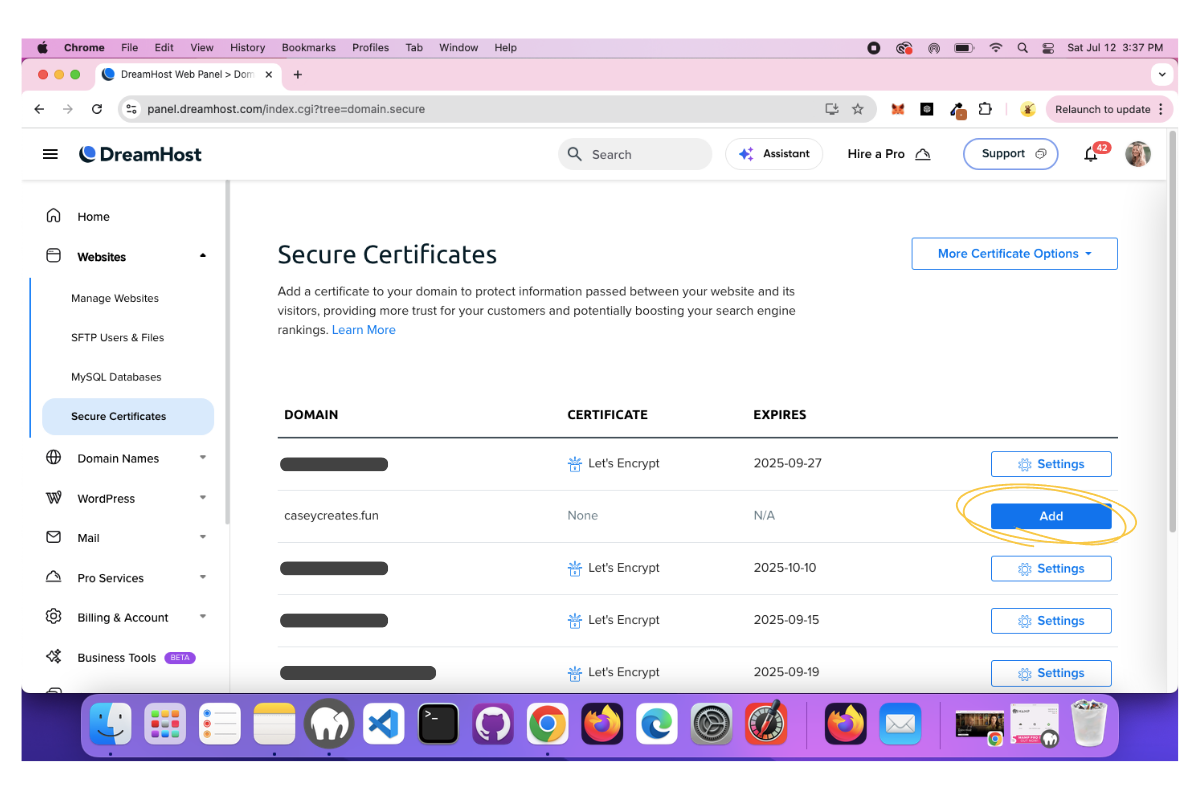
That will take you to the next page, where you will click the blue “Select this Certificate” button.

You’ll receive a success message, and you can proceed to step 2, where you’ll learn how to install your WordPress website, while your order is being processed.
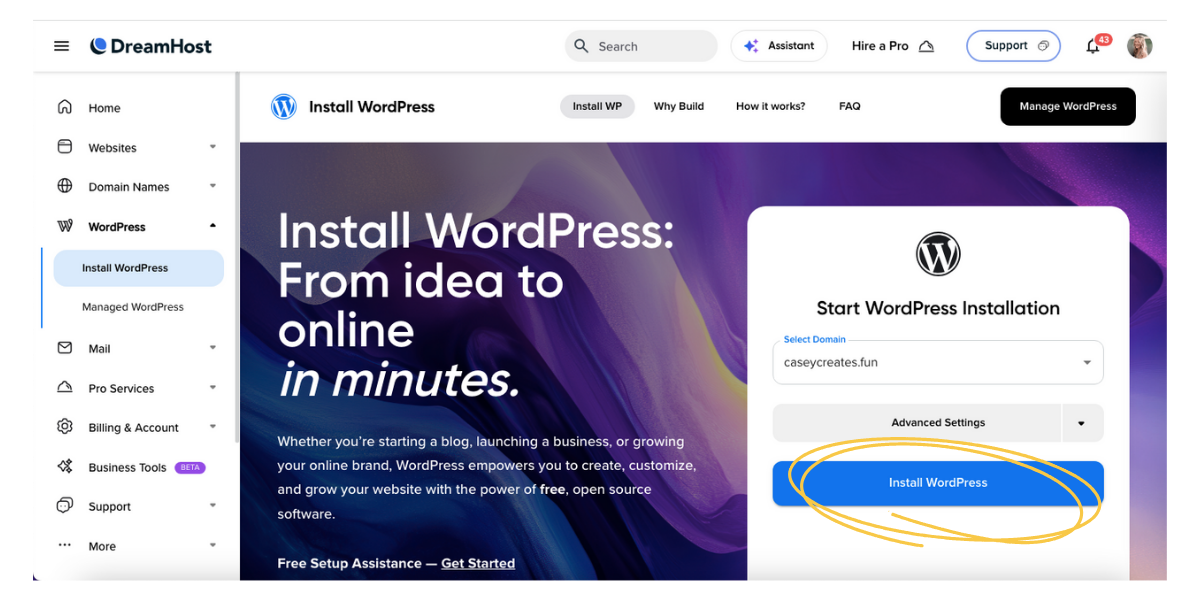
Step 2: Install – How to Make your WordPress Website Live
Back in your left-side navigation panel, click “WordPress,” then “Install WordPress” from the dropdown menu that appears.
That will take you to the “Install WordPress” page. Make sure your domain is selected, ignore the advanced settings, and click the blue “Install WordPress” button.
The next page shows two options: either Liftoff Website Builder with DreamHost or Custom Install. Choose Liftoff Website Builder and click the blue “Confirm Install” button on the right-hand side of your screen.
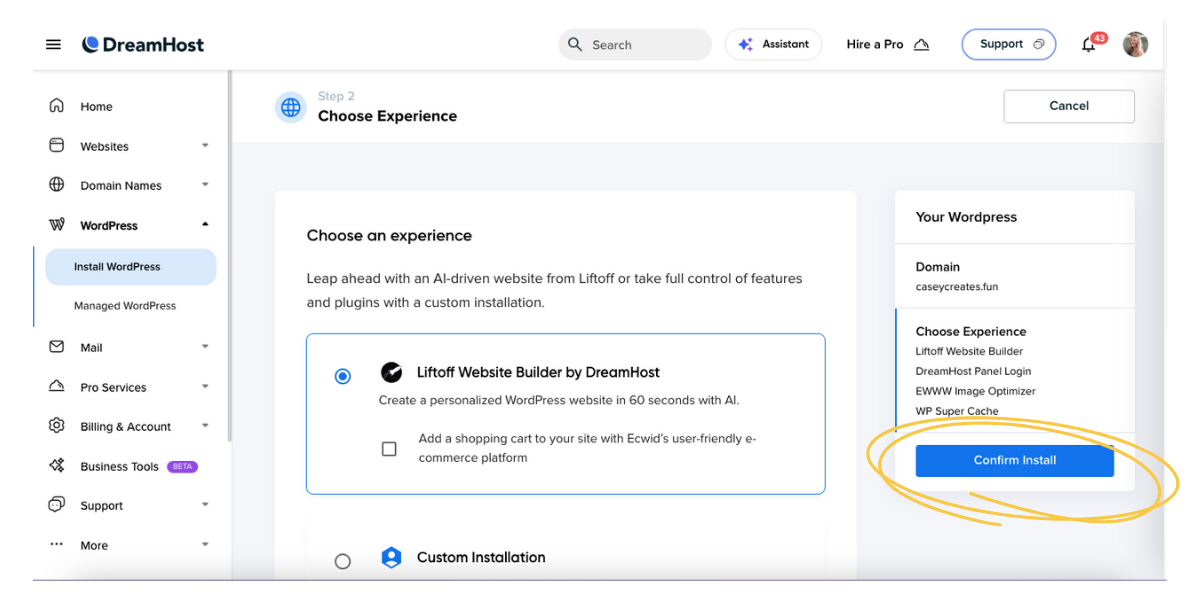
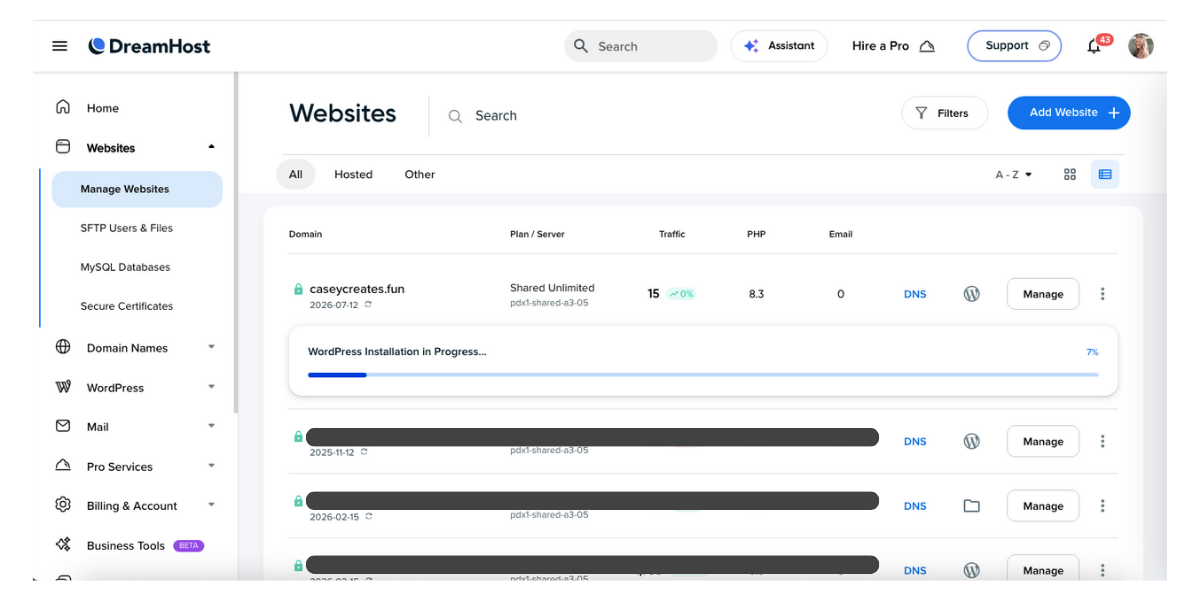
You’ll see that the WordPress installation is in progress. Wait until the installation is complete before moving on to step 3.
Step 3: Set Up Your Site with DreamHost’s AI Builder
Once WordPress has finished installing, click the “Manage” button to the right of your domain.
Toggle over to the “WordPress” section from the top menu. Ensure that both “Page Caching” and “Image Optimization” are enabled. Then click “Manage” on the far right.
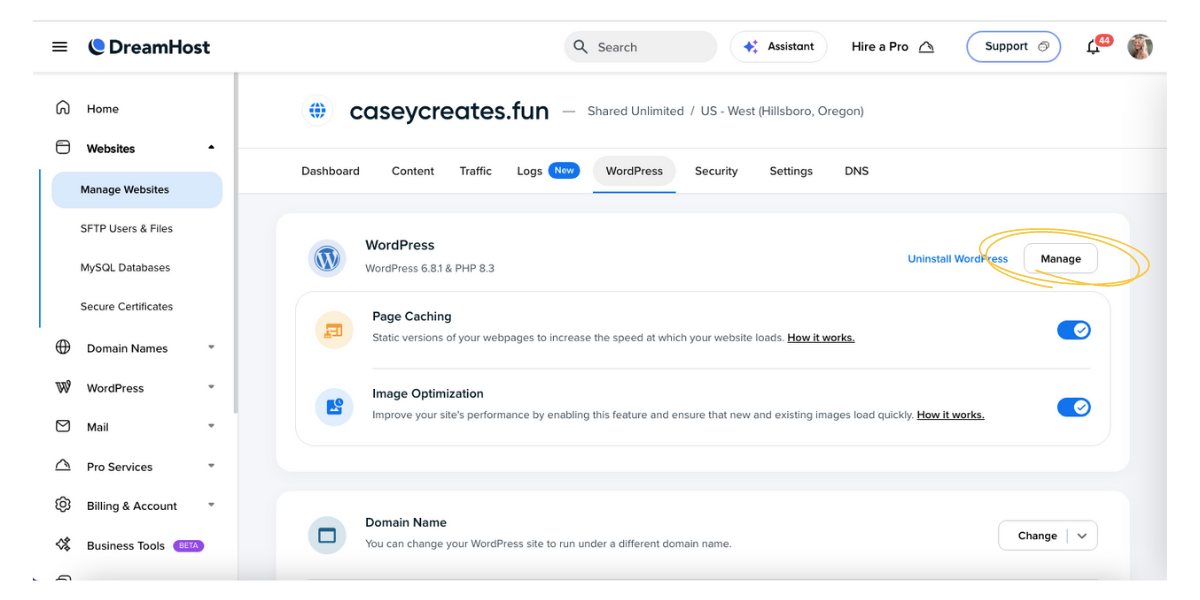
This will automatically log you into WordPress and bring you to DreamHost’s AI website builder in a brand new browser tab.
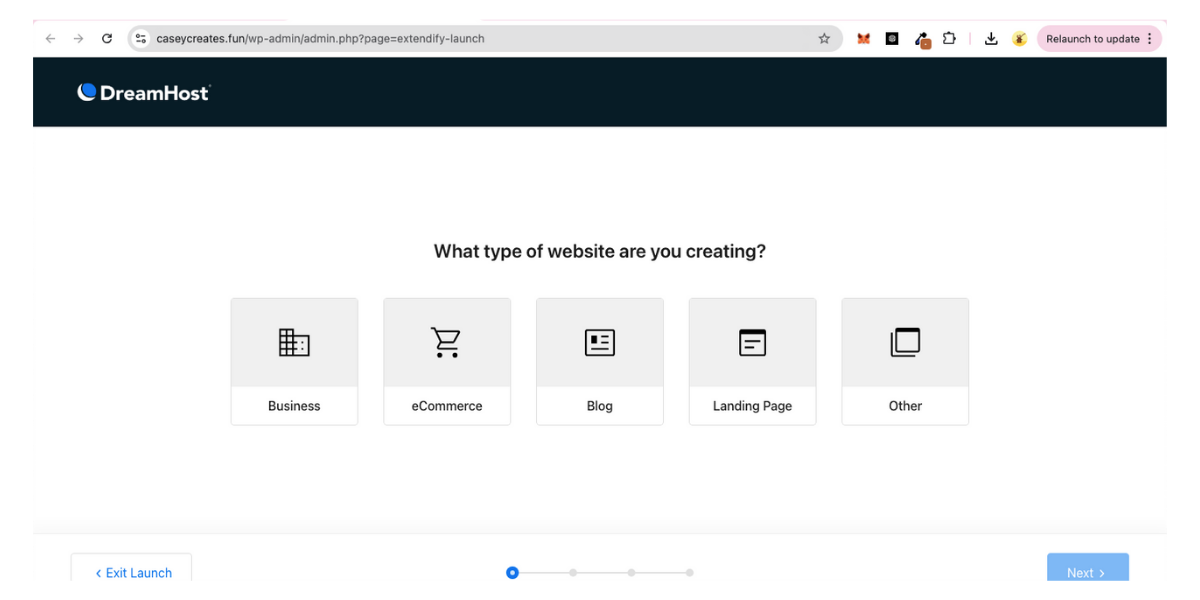
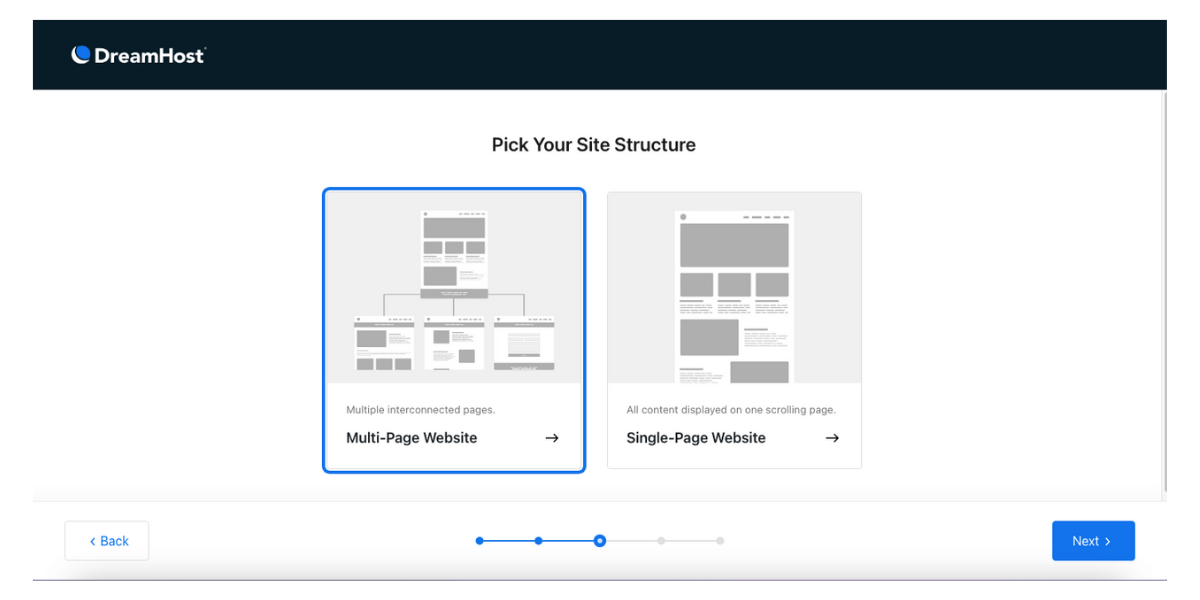
The AI builder will ask you to pick a structure for your site, whether you want a single page or multiple pages. Don’t worry, you will still be able to add pages later if you opt for the single-page structure now.
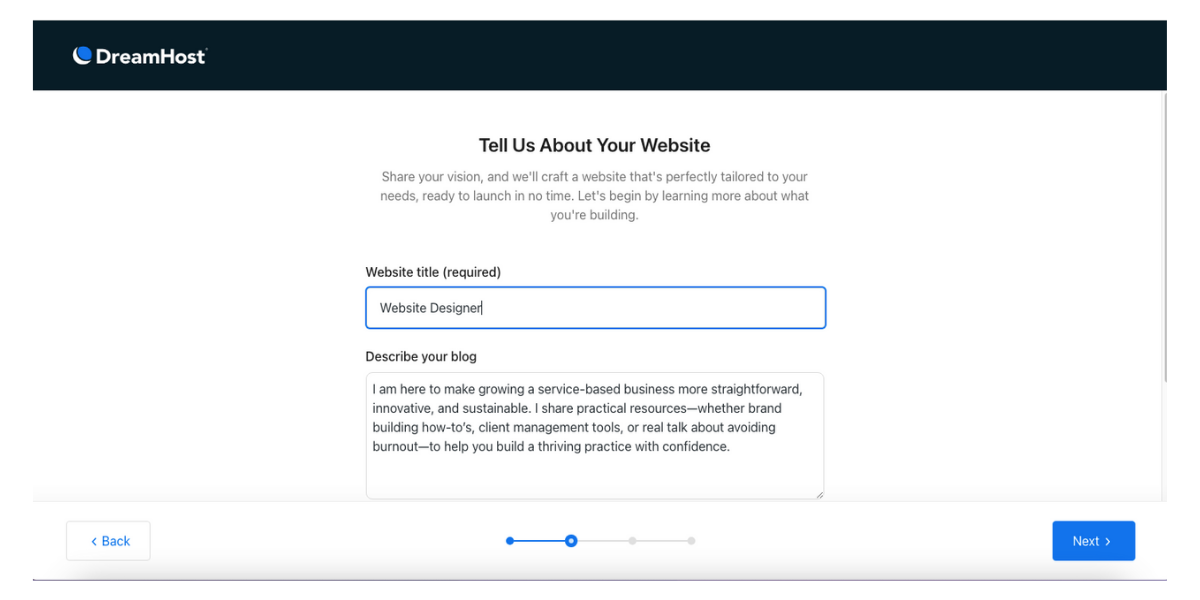
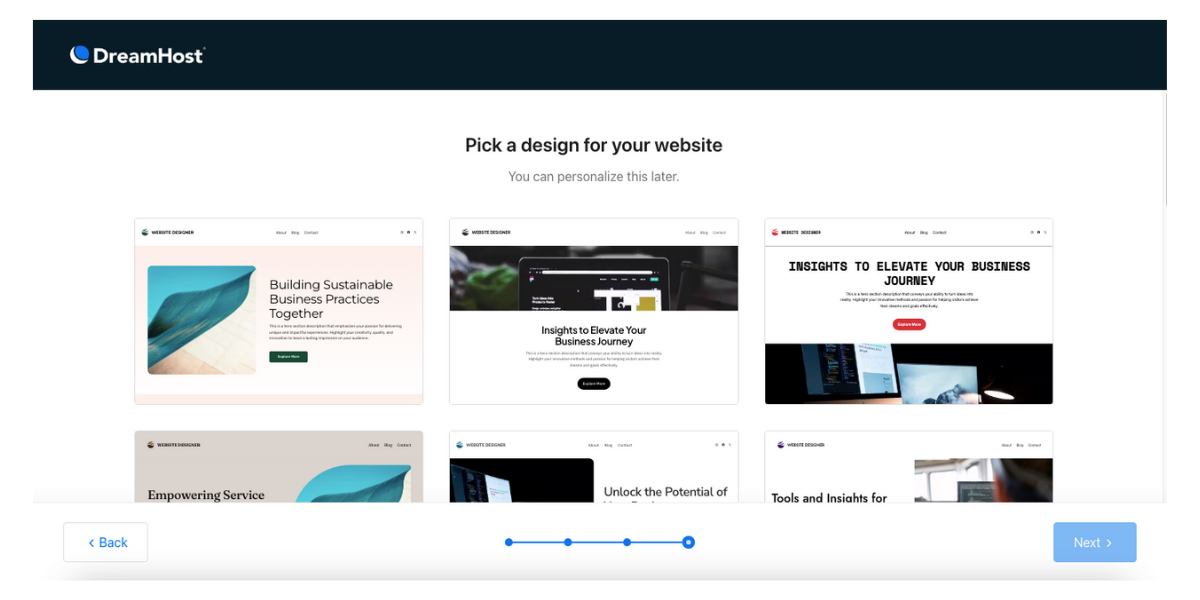
After you choose your structure, DreamHost will propagate several designs based on your inputs. Click through and see which ones you like! Once you see one that grabs your eye, select it and click “Next.”
In the upper left-hand corner of your WordPress dashboard, toggle over your website tagline. A drop-down that says, “Visit Website” will appear. Click that to view your new website!
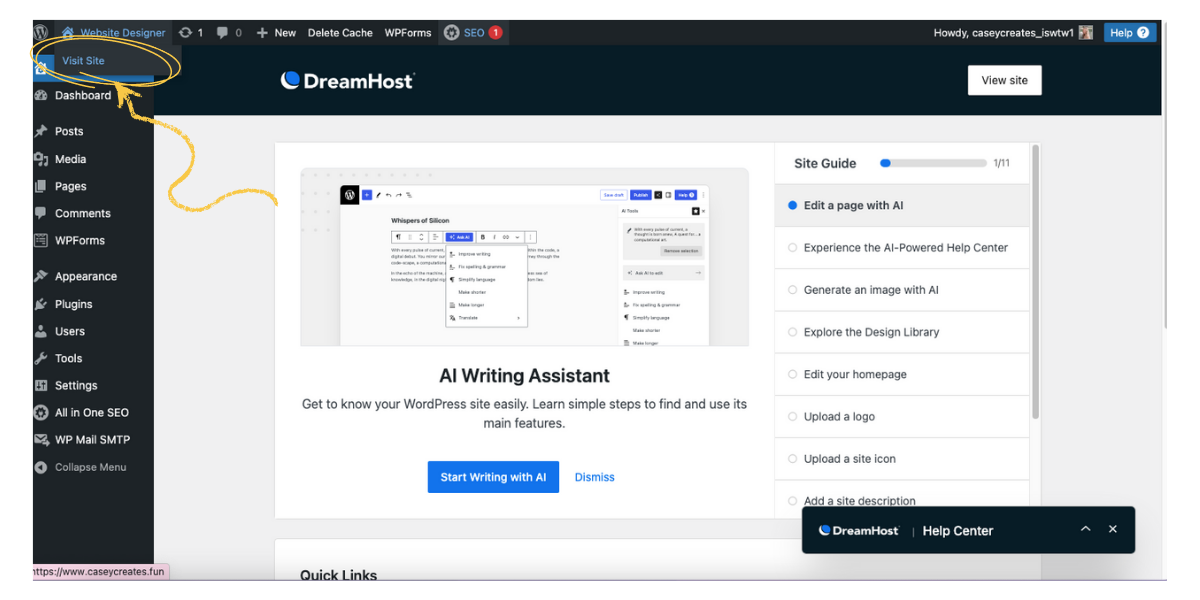
Now your site is live and ready for you to add your magic touch! Click the “edit page” button to personalize your brand-new site. Stay tuned for my post that will show you step-by-step how to personalize your site using DreamHost’s Liftoff AI drag-and-drop builder.


0 Comments